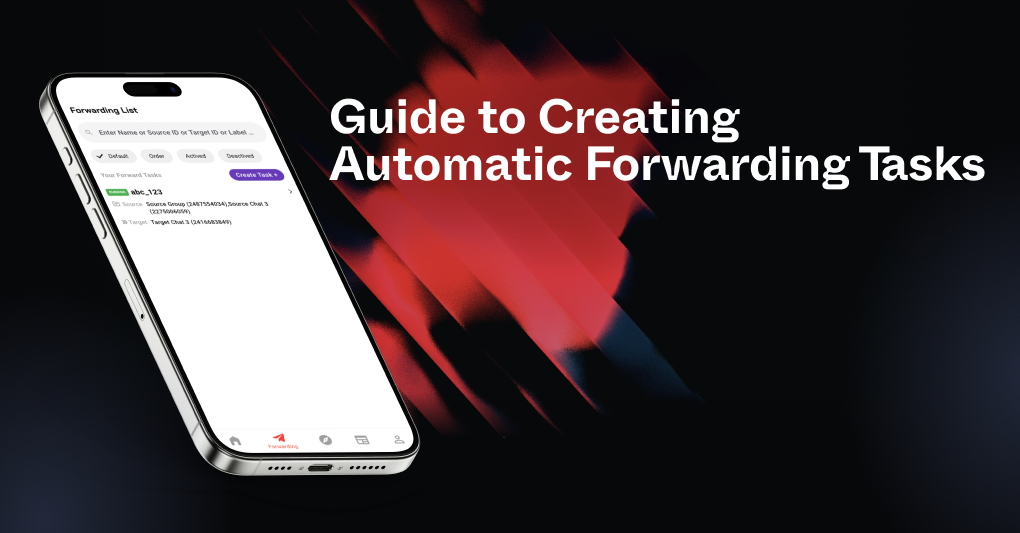
Are you spending too much time manually forwarding messages across multiple Telegram chats? If so, there’s a better way! With Auto Forward Telegram Messages, you can automate message forwarding effortlessly. Whether you’re managing a business, running a community, or simply organizing personal chats, this feature will enhance your productivity. In this guide, we will explore how to set up and use the Create Forwarding Task in Auto Forward Telegram Messages feature effectively.
Function Overview: Create Forwarding Task in Auto Forward Telegram Messages
The “Create Forwarding Task” feature in Auto Forward Telegram Messages allows users to automate message forwarding efficiently. Here’s who can benefit from this feature:
- Businesses that need to distribute important updates across multiple channels.
- Community managers handling announcements efficiently.
- Individuals who need to sync messages across personal or work-related groups.
This automation ensures that no crucial messages are missed and helps maintain consistent communication.
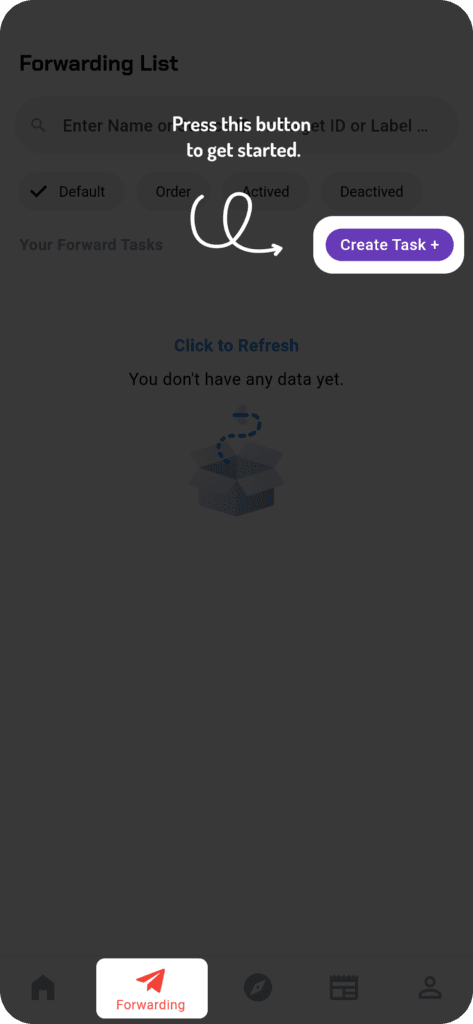
Step 1: Access the Forwarding List in Auto Forward Telegram Messages
To get started, follow these steps:
- Open the Auto Forward Telegram Messages application.
- Navigate to the Forwarding List screen.
- Locate the “Create Task +” button.
- Tap “Create Task +” to proceed to the next step.
✅ Tip: Ensure you have the necessary permissions to forward messages from your selected sources.
Step 2: Choose the Source for Forwarding Messages in Telegram
After selecting “Create Task +”, you will be redirected to the Select Source Forward screen. You have five options:
- All: Displays all available message sources.
- Channel: Filters messages coming from specific channels.
- Group: Selects messages from groups you are part of.
- User: Includes messages from individual users.
- Bot: Filters messages from Telegram bots.
Selecting “All” will include a combination of the remaining four types.


Troubleshooting Source Selection Issues in Auto Forward Telegram Messages
🚨 Common issues and solutions:
- Synchronization Delays: If you have recently joined a new chat, the BOT might not have synchronized the data yet, causing the chat not to appear.
- Incorrect Type Selection: If the chat isn’t listed, try selecting “All” to display all available sources.
💡 Quick Fix:
- Click the Reload button to refresh the chat list and allow the BOT to synchronize new data.
- Avoid unnecessary reloads to prevent delays.
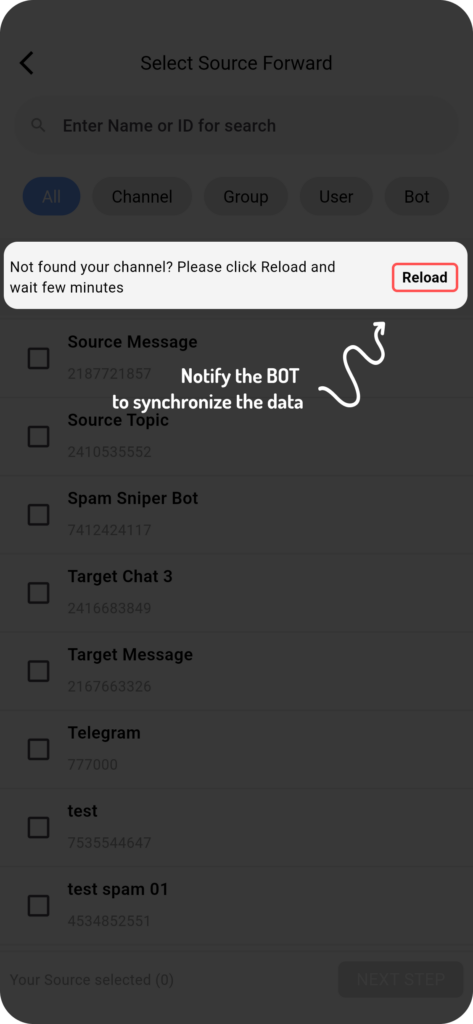
📌 Note: Only use the “Reload” action when necessary, such as when your Telegram message list exists but is not displayed.

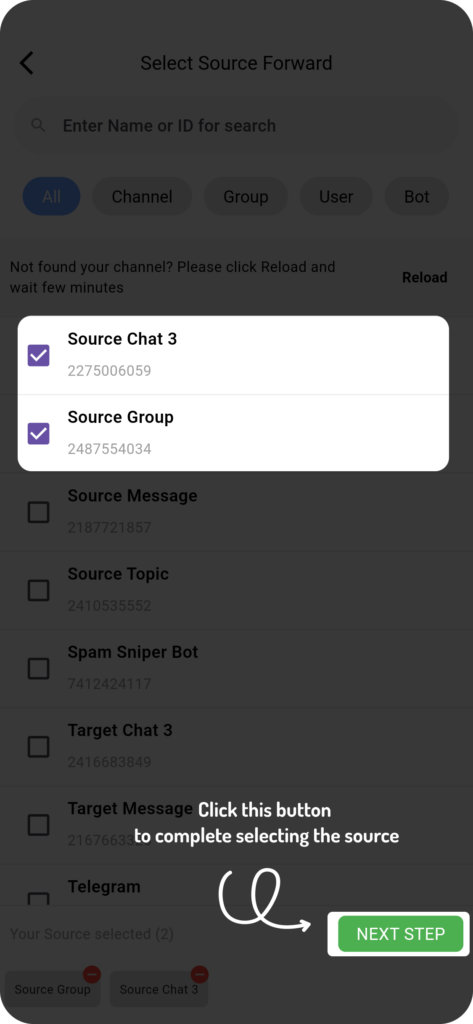
- Choose your desired source by tapping the corrresponding item to check it.
- Once the correct source is located, tap on it to select, then tap Next Step to proceed.
Step 3: Choose Your Target Destination for Auto Forwarding
On the Select Target Forward screen, you will define where the messages should be forwarded. The available options include:
- All
- Channel
- Group
- User
- Bot
📌 Tip: Choose the appropriate target to ensure your messages reach the intended audience. After selecting the target, tap Next Step to continue.
✅ Why Choosing the Right Target Matters
Selecting the right target ensures that messages reach the right audience at the right time. For example, forwarding business updates to a dedicated group improves team coordination, while sending news updates to a channel ensures broad visibility.target, tap Next Step to continue.

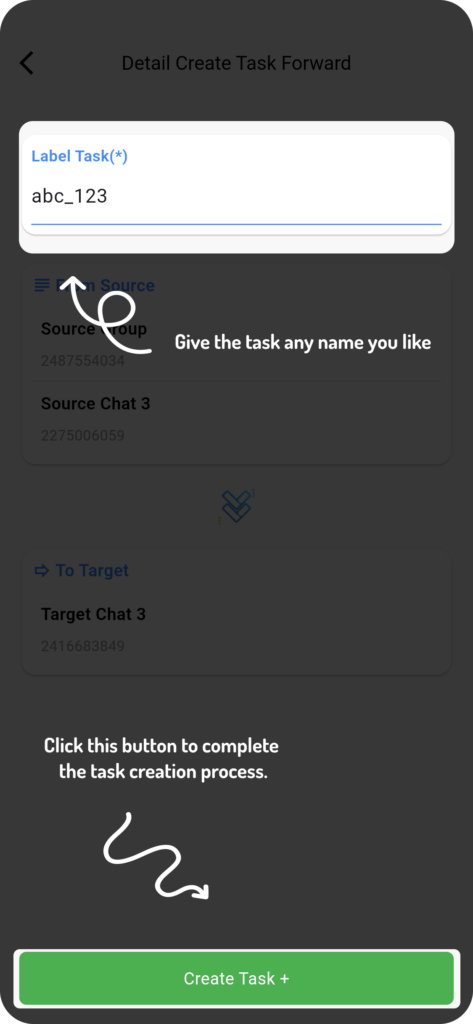
Step 4: Configure Forwarding Task Details
Now, set up the essential parameters for your forwarding task:
✅ Assign a Task Label: Enter a meaningful name for your task in the input field.
📝 Label Naming Rules:
- Use only Latin letters (‘a’ to ‘z’) and numbers (‘1’ to ‘9’).
- Special characters are not allowed.
- Use underscores (_) instead of spaces to separate words.
Once all necessary details are verified, tap Create Task to finalize the process.
Final: Achieved results
Your task is now created and activated! 🎉 You can view or manage it from the Forwarding List screen.
✅ Managing Your Auto Forwarding Tasks
Once created, you can edit, pause, or delete forwarding tasks based on your requirements. Regularly reviewing your tasks ensures optimal performance and prevents unnecessary message forwarding.

Conclusion: Optimize Your Telegram Forwarding with Auto Forward Telegram Messages
With Auto Forward Telegram Messages, you no longer have to waste time forwarding messages manually. By setting up a Create Forwarding Task in Auto Forward Telegram Messages, you can streamline communication across multiple channels, groups, and users effortlessly.
Tips for Best Use of Auto Forward Telegram Messages
To get the most out of Auto Forward Telegram Messages, follow these best practices:
✔️ Double-check your source and target selections: Ensuring accuracy will prevent messages from being forwarded incorrectly.
✔️ Use descriptive task labels: Clearly named tasks make it easier to manage and identify forwarding rules later.
💡 Optimize forwarding frequency: If you are forwarding high-volume messages, adjust settings to avoid unnecessary duplication.
Following these steps simplifies the management of message forwarding tasks, helping you automate your workflow effortlessly.
Download or use BOT at
IOS VERSION:
AutoForward For Telegram – App on the App Store
ANDROID VERSION:
AutoForward for Telegram – App on Google Play
BOT VERSION:
https://t.me/Auto_Forward_Messages_Bot
WEB VERSION:
https://web.autoforwardtelegram.com
👉 See More: How to Create Watermarks for Automatically Forwarded Messages
For any assistance, reach out to @redf0x1